Microscope Lab #2
|
|
Biology 1 Microscope Lab #2 |
|
Background Information
What Is a Microscope
In the most basic sense, a microscope is a tool that’s used to see objects that
are too small to be seen by the eye alone. There are many things happening in
the world around us and inside of us that we simply can’t see, although we know
that they happen. Blood cells move through the body carrying nutrients and
oxygen, but without a microscope, we can’t see those individual blood cells.
Because microscopes are so useful, they’ve become an essential tool in many
fields of science and have helped us understand how the world works. But how do
microscopes work, and are they all the same?
How Does a Microscope Work
The very first microscopes weren’t very effective, but they’re a good
illustration of how a microscope works. They were created by opticians who were
used to grinding glass into lenses for people who needed eyeglasses.
These eyeglass makers realized that if they put one lens at the bottom of a tube
and one at the top, they could use the power of both lenses to see tiny objects
more clearly. These original microscopes were the first examples of compound
microscopes, which are microscopes that use more than one lens to view objects.
An even more basic microscope is a single convex lens, which we call a
magnifying glass.
In a basic compound microscope, the lens at the bottom of the tube which is
closest to the object is the objective lens. This lens takes the light rays that
bounce off the object and spreads them apart through a convex lens so they
appear bigger. When they appear bigger, we can see them in greater detail than
we could without the aid of the lenses.
At the top of the compound microscope is another lens which is called the
eyepiece. This lens also magnifies the image coming from the objective lens to
give you a more detailed and clearer view of the subject.
While two lenses are necessary for a basic compound microscope to work, a light
source is also a key factor. Many microscopes today have their own light
sources, but a mirror behind and below the objective lens makes a great light
source that can be angled to hit the object precisely.
Detailed Steps of How a
Microscope Works
That’s the basic premise behind a microscope; it’s pretty simple with two lenses
and a light source. Let’s look at it one step at a time to further understand
what’s happening. We’ll use a basic compound microscope with two lenses to
continue the explanation.
Other Types of Microscopes
The basics of how a
compound microscope works are the same ones that are used in other microscopes.
Compound microscopes are still a very important and powerful tool, and they’re
used regularly, but there are some advances that have occurred in the more than
400 years since the first microscope, and we have some other options available.
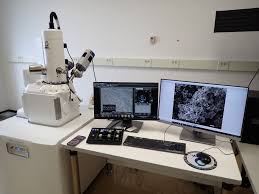
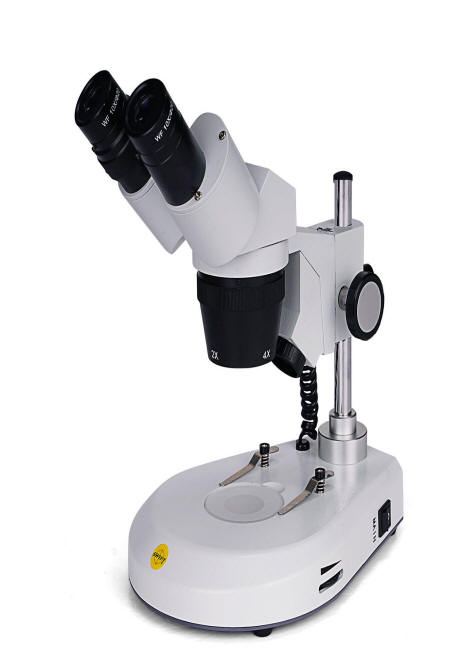
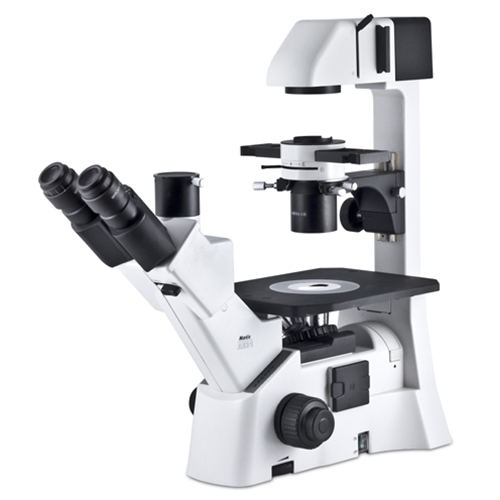


These are a few of the more common microscopes available, but there are many
more to choose from. The field of microscopy has become very specialized,
allowing for detailed analysis in a variety of professions.
Part One: Making Temporary or Wet-Mount Slides
What is a wet-mount slide:
How is a wet-mount slide made:
When is a wet-mount slide used:
Temporary mount slides are often used to
observe live organisms or time-sensitive samples, such as
microscopic organisms in pond water.
Why is a wet-mount slide only temporary:
The water evaporates, so the slide can't be
stored for long periods of time.
In contrast, a prepared slide is
permanently mounted using a solidifying mounting medium.
How do you make a wet-mount slide:
place a small sample of your specimen on a clean slide
add a single drop of water (or other liquid-type stain) on top of the specimen
carefully lower a cover-slip onto the slide at an angle that will avoid producing air bubbles (usually a 45º angle will do this)
Materials Needed for Part One:
Part One: Making a Temporary Slide
1. Find the smallest letter "e" in the newsprint like the one below, and using your scissors cut it out of the newspaper.
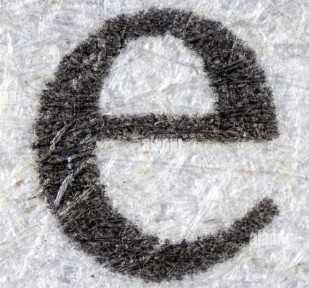
2. Make a temporary slide of this letter "e". Manipulate the letter "e" it so that it is in the "reading position" like the diagram below:

3. View the letter "e" under low power and medium power. Make your sketches of the letter "e" EXACTLY AS IT LOOKS AS YOU VIEW IT WITH THE MICROSCOPE. You can just draw this with a pencil. You do not need to make a colored sketch.
4. Discard this wet-mount slide in the appropriate trash receptacle.
Part Two: Making Wet-Mount Slides with Stain
Why use stains:
Stains are used when viewing cells under a microscope to
enhance their visibility by creating contrast between different cell components,
allowing for better observation of cell structures and morphology, as most cells
are naturally transparent and difficult to see without staining; essentially,
stains "color" specific parts of a cell, making them easier to distinguish from
their surroundings.
The biological stain that we use is called crystal-violet. It is made by dissolving the dry powder in a sample of water. Since this stain affects all biological items you should be careful so as not to get any of this stain on your hands or clothing. This stain is "semi-permanent" on you skin (usually comes off after a number of hand washings), but will be permanent if it gets on your clothing.
Materials Needed for Part Two:
Procedure: Onion Skin Observation
1. Remove some onion skin from the onion as discussed earlier in class, and place it on the clean glass slide. Be sure to smooth it out as best as possible so there are few to no wrinkles in it.
2. Place a drop of crystal-violet stain on top of the onion skin and cover with a cover slip being careful to avoid air bubbles.
3. View the onion skin slide under low and medium power and make sketches of what you see. Use colored pencils to make your sketches colorful. When you make your sketches, use a regular pencil to draw the outline of the specimen and then use colored pencils to fill in the colors; this will make for a better looking sketch and will also help you define the cell membranes for each sketches.
4. This is what stained onion skin should look like under the microscope:
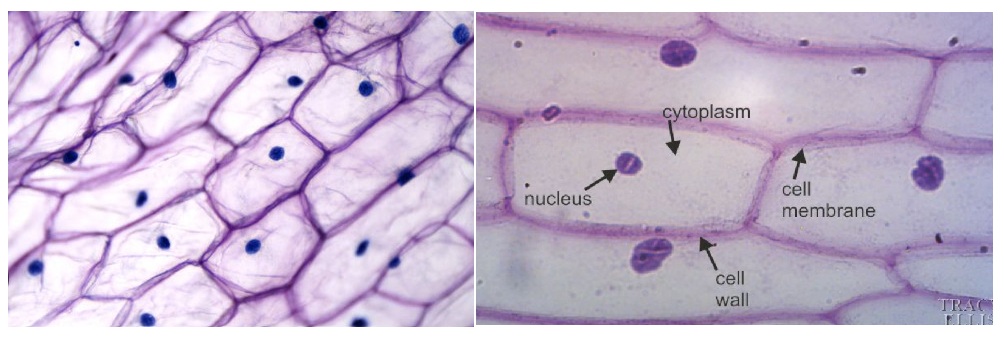
5. Discard the onion skin slide you made into the designated trash receptacle.
Procedure: Human Cheek Cell Observation
1. With the toothpick provided, gently scrape the inside of your cheek to get some cells on the end of the toothpick.
2. You do not have to scrape very hard, and more than likely you will not even see anything on the end of the toothpick.
3. Swab the end of the toothpick that contains your cheek cells onto a clean slide. Again, it may not look like much other than a smudge, but cells are there.
4. With the pipette, add a drop of crystal-violet stain to the cells and add a cover-slip on top of the cells that you just stained.
5. The stain will also bring into view the nucleus of the cell. The nucleus will appear as the round, darker, middle portion of the cell. It is these types of cells that the Forensic Scientists (CSI dudes) collect and test for DNA when they take a cotton Q-tip and swab the inside of a suspect's mouth. Each cell they collect will contain thousands of DNA molecules which can be used to positively identify an individual. This is what these cells might look like:
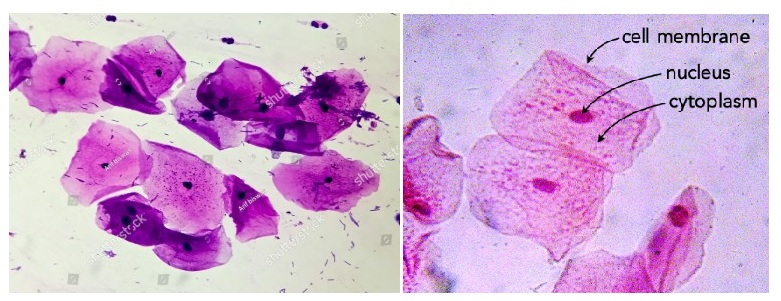
6. Use your microscope to view these cells under both low and high power. Make sketches of what you see. Use colored pencils to enhance your diagrams. When you make your sketches, use a regular pencil to draw the outline of the specimen and then use colored pencils to fill in the colors; this will make for a better looking sketch and will also help you define the cell membranes for each sketches.
7. Discard the cheek cell slide you made into the designated trash receptacle.
8. Complete the Microscope Lab #2 Review (Jupiter Ed) assignment.